Remington 40-X, XR-100 & XCR Tactical, Target Trigger Spring
| Remington
XR-100 Trigger | 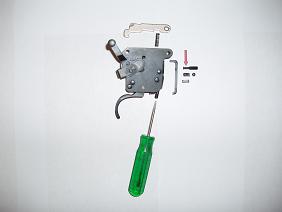 |
Lighten your rifle trigger pull. On average, installation of this spring will reduce your factory triggers weight of
pull by 1½ to 2½ lbs. The exact amount of creep, overtravel and weight of pull are dependant
upon the type and amount of tuning accomplished by your gunsmith.
These triggers are easily
identified by their downward facing weight of pull adjustment screw. This screw can be accessed through the trigger
guard without disassembling the rifle. These triggers need special attention to keep them clean.
Use a cleaning rod guide to protect the trigger from barrel cleaning solvents and oil. Do not spray aerosol lubricants
directly into the trigger. Over time, many of these products will get sticky and retard the free movement of the trigger
and sear within the trigger housing. ESPECIALLY IN COLD WEATHER.
Any rifle which may have an accumulation of dirt and oil in the trigger housing should be cleaned by a gunsmith before any
springs are changed or adjustments are made.
This model may not be a common sight in the future,
so I include these photos for your reference. This action includes features from the XP-100, M-7 & the 40-X.
| Picture #1. | | | | Picture
#2. | 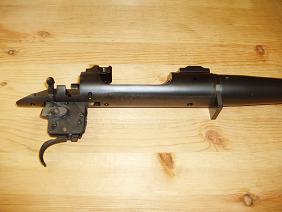 | | Picture #3. | 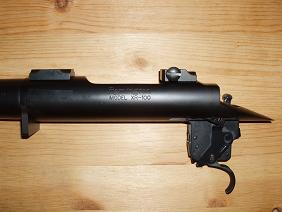 | | Picture #4. | 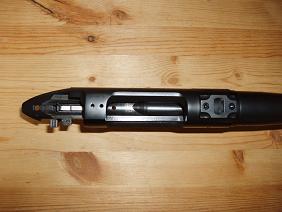 | | Picture #5. | 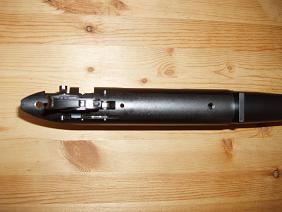 | | Picture #6 | 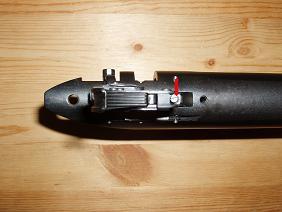 |
The trigger housing, plus eight of its internal arts are illustrated in picture #1. I show the trigger disassembled
in this way only to help people visualize the parts contained within the housing. The overtravel adjustment screw is
held in place with a dab of Duco cement. DO NOT REMOVE this scew unless you plan to remove the entire trigger assembly
from the receiver,as has been done in this picture. The first step necessary to replace your triggers weight of pull
spring, is to remove the weight of pull screw. The green handled screwdriver points to this screw. Next, remove
the spring tensioning ball. A small bit of metal is lightly staked in place to prevent the ball from simply falling
out. Tap this bit of metal back into place so that the ball and original weight of pull spring are free to fall out.
Next, drop in the new spring, the tensioning ball, and re-install the adjustment screw. A small center punch can be used
to re-stake the ball in place. Any further adjustment should be left to a competant gunsmith.
Picture #2 is the right side view of the XR-100 receiver.
In picture #3 we see the M-7 style bolt stop assembly.
Picture #4 shows the short M-7 style receiver bridge with its narrow .285" scope base
screw spacing.
Picture #5 is of the XR-100"s solid
bottom, single shot receiver.
The red line points to another view of the weight of pull adjustment screw.
IF YOU WANT A LIGHTER TRIGGER PULL, YOU NEED A LIGHTER TRIGGER SPRING!
No liability is expressed or implied for damage or injury which may result from the improper installation
or use of this product.
Item #007
|