|
|
|
No. 7. Machine "Bed Heads" Pillars to Length
All "Bed Heads" pillars for M-70 Winchester are longer than necessary, to allow
custom fitting for each rifle.
Note, this same
process also applies when it is necessary to shorten the Remington M-700 ADL front pillar to fit a custom stock, or
a custom front guard screw escutcheon. Just remember, this time it is the Lower end of the pillar that gets trimmed.
| Picture #1 | 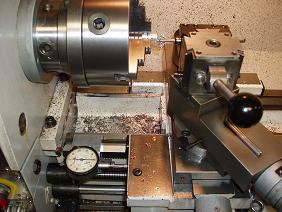 |
If you have a lathe, you will of course, use it to trim these pillars to length.
Picture
#1 shows a dial indicator being used to measure the length being trimmed from a pillar.
| Picture #2 | 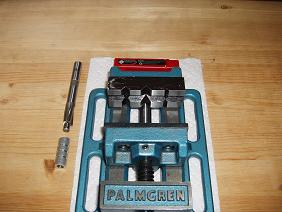 |
If you do not have a lathe however, you can still do a very nice job of machining these pillars to
length, and square, to match the flat bottom of the M-70 receiver. This set-up requires a drill press with some type
of adjustable quill stop, a drill press vise with 1 "prismatic" jaw to locate the pillar vertically and a
1/2" counterbore with a 5/16" pilot.
| Picture
#3 | 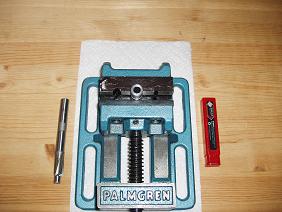 |
The "Bed Heads" pillar ID is reamed to .312 (5/16") this reamed hole provides an accurate fit for the Teflon
sleeves during the pillar installation process. It also provides an accurate fit for the 5/16" (.312") pilot
on the end of the counterbore. These counterbores and pilots are available from MSC and other industrial tool suppliers.
Interchangeable pilot counterbore
3 flute 1/2" diameter 7/16" Shank 3/16"
Pilot shank MSC part # for USA made tool 08812323
Interchangeable Pilot
3/16" shank 5/16"
Pilot MSC part # for USA made tool 78904208
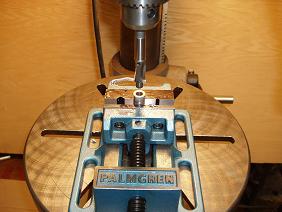
| Picture #4 | 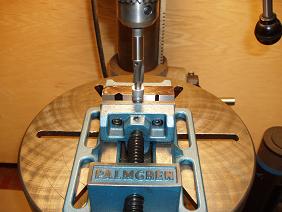 |
The counterbore pilot has been lowered
into the pillars ID.
Turn the drill press on and continue to lower the quill until the stop has been
reached.
| Picture #5 | 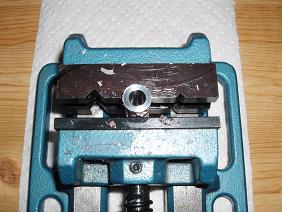 |
In picture #5, The pillar has been
cut to length. The accurate fit between the pillar ID and the counterbore pilot has made it possible to achieve a nice
smooth finish on the end of this pillar.
All that is necessary now, is to de-burr the outside edge.
No liability is expressed or implied for
damage or injury which may result from the improper installation or use of this product.
(Instructions above are for information only, do not add to cart)
Item #2007
|
|